How to Integrate Push Notifications into Your PWA

In our tutorial today, we’ll be integrating Push Notifications into a PWA using Firebase, or to be more specifically, using the Cloud Messaging feature within it which enables sending of messages using HTTPS requests.
Progressive Web Apps and Push Notifications
Since the Progressive Web App is that of an ever-changing movement, it’s hardly surprising to see that the technology itself has become on-par (function-wise) with its native app counterpart.
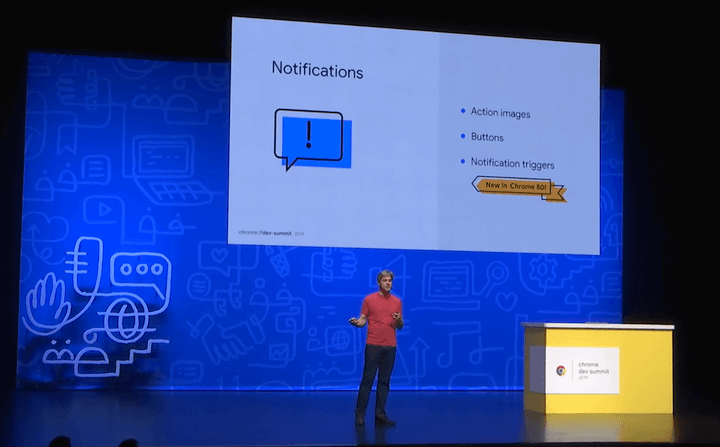
Notification triggers give developers the ability to schedule notifications, even if the user’s device is on airplane mode.
Jon Krafcik, Chrome Dev Summit 2019
With all these radical changes in-place, it would be a waste not to take advantage of it to drive even more revenue to your PWA. And it isn’t even something overly complicated as you could easily set up a Push Notification function of your own using this tutorial.
How to integrate Push Notifications into your PWA
In our tutorial today, we’ll be integrating Push Notifications into a PWA using Firebase, specifically the Cloud Messaging feature within it which enables sending of messages using HTTPS requests.
Prerequisites
- A Firebase account (since you will be creating a project within Firebase)
- A Progressive Web App. For a simplified demonstration, we’ll be using a create-react-app which is a basic PWA that can be created using a command
Step 1: Create a basic PWA
Since we’ll be creating a basic PWA using create-react-app, let’s download NodeJS first. After you’re finished installing NodeJS, open NodeJS Command Prompt and run the following commands.
To create a simple React app in your specified directory:
npx create-react-app your-pwa-directory
Change current working directory to your newly created React app:
cd your-pwa-directory
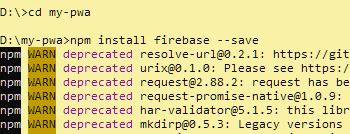
Add the Firebase JavaScript library to project:
npm install firebase --save
Step 2: Create your push-notification.js
The next step is to create the module that will be in charge of all your notification processings. In <your-pwa-directory>\src, create a file named push-notification.js.
First, let’s create a function that initializes Firebase and passes the keys of your project. You can find the keys for your project by going into Firebase > Project Overview → Project Settings and click on this icon:
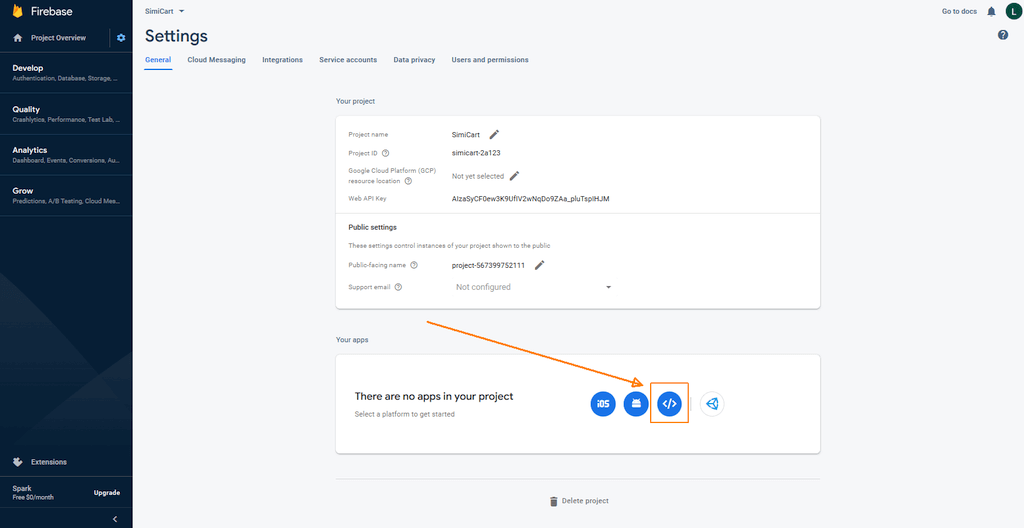
This will direct you to another page which contains the Firebase SDK for your PWA:
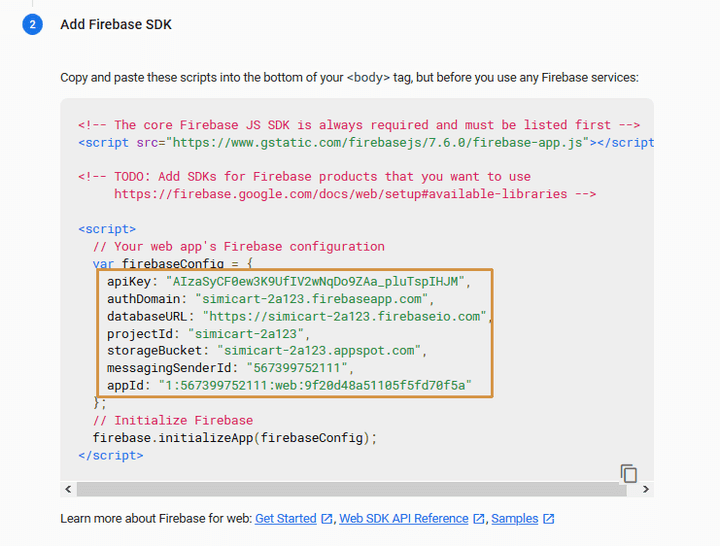
Now that we have the keys for our project, let’s add the following code into your push-notification.js.
import firebase from 'firebase';
export const initializeFirebase = () => {
  firebase.initializeApp({
    apiKey: "XXXXXXXXXXXXX",
    authDomain: "XXXXXXXXXXXXX",
    databaseURL: "XXXXXXXXXXXXX",
    projectId: "XXXXXXXXXXXXX",
    storageBucket: "XXXXXXXXXXXXX",
    messagingSenderId: "XXXXXXXXXXXXX",
    appId: "XXXXXXXXXXXXX"
  });
}
With this you have created the function in charge of all your notification processing, you’ll now need to import and call it. Edit your index.js like so:
import React from 'react';
import ReactDOM from 'react-dom';
import './index.css';
import App from './App';
import * as serviceWorkerRegistration from './serviceWorkerRegistration';
import reportWebVitals from './reportWebVitals';
import firebase from 'firebase';
import { initializeFirebase } from './push-notification';
ReactDOM.render(<App />, document.getElementById('root'));
initializeFirebase();
Step 3: Create a service worker
Service Workers is the name of the technology behind a Progressive Web App, which power its offline capability, push notifications and resource-caching.
SimiCart, All You Need to Know About Progressive Web Apps
A service worker is required for the receiving of the onMessage event and consequently, allowing for notifications to be sent to the user’s device. By default, Firebase automatically looks for a file called firebase-messaging-sw.js.
Let’s add firebase-messaging-sw.js to the directory where your files are served. Since ours is a create-react-app project, this firebase-messaging-sw.js will be going in our public folder:
importScripts('https://www.gstatic.com/firebasejs/8.4.1/firebase-app.js');
importScripts('https://www.gstatic.com/firebasejs/8.4.1/firebase-messaging.js');
firebase.initializeApp({
    apiKey: "XXXXXXXXXXXXX",
    authDomain: "XXXXXXXXXXXXX",
    databaseURL: "XXXXXXXXXXXXX",
    projectId: "XXXXXXXXXXXXX",
    storageBucket: "XXXXXXXXXXXXX",
    messagingSenderId: "XXXXXXXXXXXXX",
    appId: "XXXXXXXXXXXXX"
});
const messaging = firebase.messaging();
If you have not heard about PWA Service Worker yet, we have an exclusive article for you to learn all about this amazing technology.
Step 4: Request user permissions to send notifications
It’s the age of privacy, and you don’t want to annoy your users by sending unwanted and unauthorized notifications!
To request your user’s permission, simply add this to your push-notification.js:
import firebase from 'firebase';

export const initializeFirebase = () => {
  firebase.initializeApp({
    apiKey: "XXXXXXXXXXXXX",
    authDomain: "XXXXXXXXXXXXX",
    databaseURL: "XXXXXXXXXXXXX",
    projectId: "XXXXXXXXXXXXX",
    storageBucket: "XXXXXXXXXXXXX",
    messagingSenderId: "XXXXXXXXXXXXX",
    appId: "XXXXXXXXXXXXX"
  });
}

export const askForPermissionToReceiveNotifications = async () => {
  try {
    const messaging = firebase.messaging();
    await messaging.requestPermission();
    const token = await messaging.getToken();
    console.log('Your token is:', token);

    return token;
  } catch (error) {
    console.error(error);
  }
}
And since this function will need to be called from somewhere, so we’ll add it at the click of a button. Edit the app.js file in your /src/ directory like so:
import logo from './logo.svg';
import './App.css';
import { askForPermissionToReceiveNotifications } from './push-notification';

function App() {
  return (
    <div className="App">
      <header className="App-header">
        <img src={logo} className="App-logo" alt="logo" />
        <p>
          Edit <code>src/App.js</code> and save to reload.
        </p>
        <a
          className="App-link"
          href="https://reactjs.org"
          target="_blank"
          rel="noopener noreferrer"
        >
          Learn React
        </a>
		 <button onClick={askForPermissionToReceiveNotifications} >
          Click to receive notifications
        </button>
      </header>
    </div>
  );
}

export default App;
Now let’s yarn start our project and you should see a Click to receive notifications button like so:
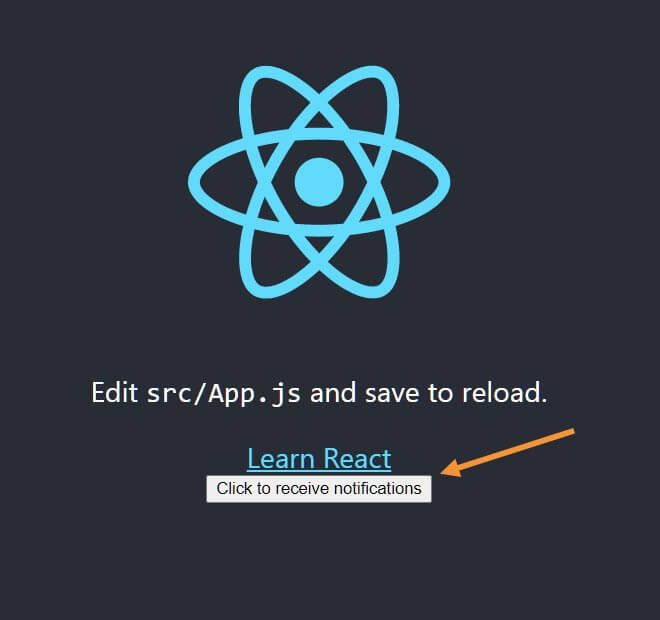
Click on the button and you should see a popup asking for your permission:
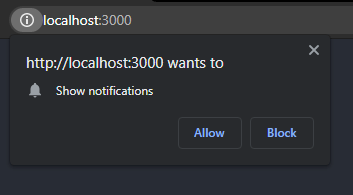
Click on Allow and check your browser’s console. You should see a message notifying you of your token:

Now save this token somewhere else because you’ll be needing it in the next step.
Step 5: Send push notifications with Postman
In the next following steps, we’ll be using Postman to send notifications using Firebase’s Cloud Messaging service.
In Postman, create a POST request with the following information:
- Request URL: https://fcm.googleapis.com/fcm/send
- Headers: In the headers of your POST request, you’ll need to have the following keys:
Authorization: key=SERVER_KEY
Content-Type: application/json

Notes: SERVER_KEY can be found under the Cloud Messaging tab in your Firebase settings
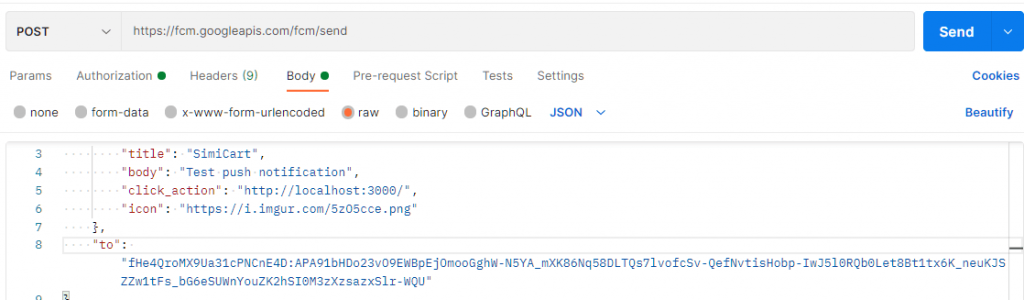
- Body: Fill the body of your POST request with the following code:
{
    "notification": {
        "title": "SimiCart",
        "body": "Test push notification",
        "click_action": "http://localhost:3000/",
        "icon": "https://i.imgur.com/5zO5cce.png"
    }
    "to": "USER_TOKEN"
}
Replace USER_TOKEN with the token that you obtained (by clicking on the Click to receive notifications button) in Step 4. Don’t forget to choose Body type as raw and JSON.
Now click on Send and you should see a notification popping up in your bottom-right corner:
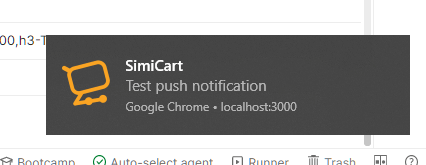
Notes: These notifications only appear when the app is in the background or minimized.
Congratulations! Your PWA can now send notifications!
Conclusion
We hope that after this guide, you can now confidently set up a push notification function of your own. Being a new technology, Progressive Web Apps sure is a complicated thing for non-tech-savvy users, which is why there are readily available solution providers such as SimiCart who can take care of your every need with our years of experience in PWAs.