
Table of contents
Normally, you’d want to make changes directly on the pwa-studio project but this approach is, however, far from ideal if you want to build extensions. For extensions, you want to be able to easily disable them off, or be able to import multiple extensions into a project with ease.
To do so, we can create a package inside the created project and import back from the JSON file. This process was, fortunately, made simplified for us with the help of a npm package released by Lars Roettig, a Magento maintainer: https://www.npmjs.com/package/@larsroettig/create-pwa-extension
In this tutorial, we’ll try to use this package to create a PWA Studio extension.
1. Install Magento PWA Studio
First we need to install a PWA Studio project. This is fairly easy if you follow our guide here: How to Setup Magento 2 PWA Studio
*Note: at the questions step, for this question “Install package dependencies with yarn after creating project” you need to select No instead of Yes as in our setup tutorial.
2. Create a new route
cd into your project directory.
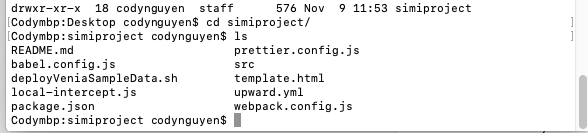
Run this command:
yarn create @larsroettig/pwa-extension
It’ll ask for more information regarding the extension:
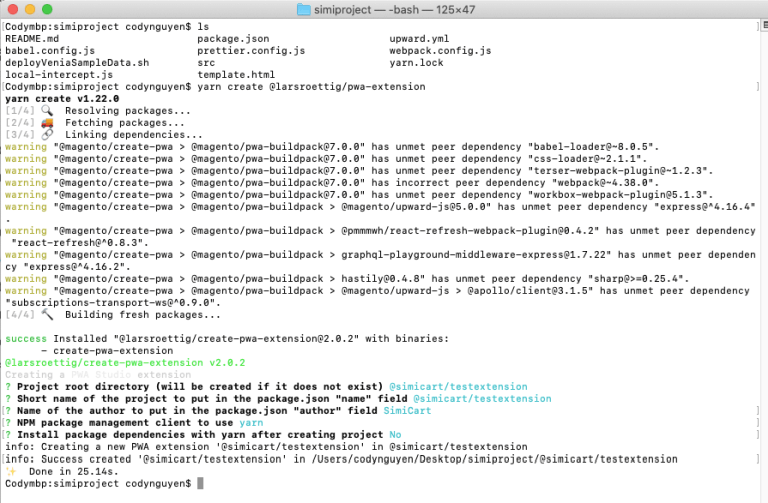
Again, remember to select No at the question “Install package dependencies with yarn after creating project“.
Open the created directory.
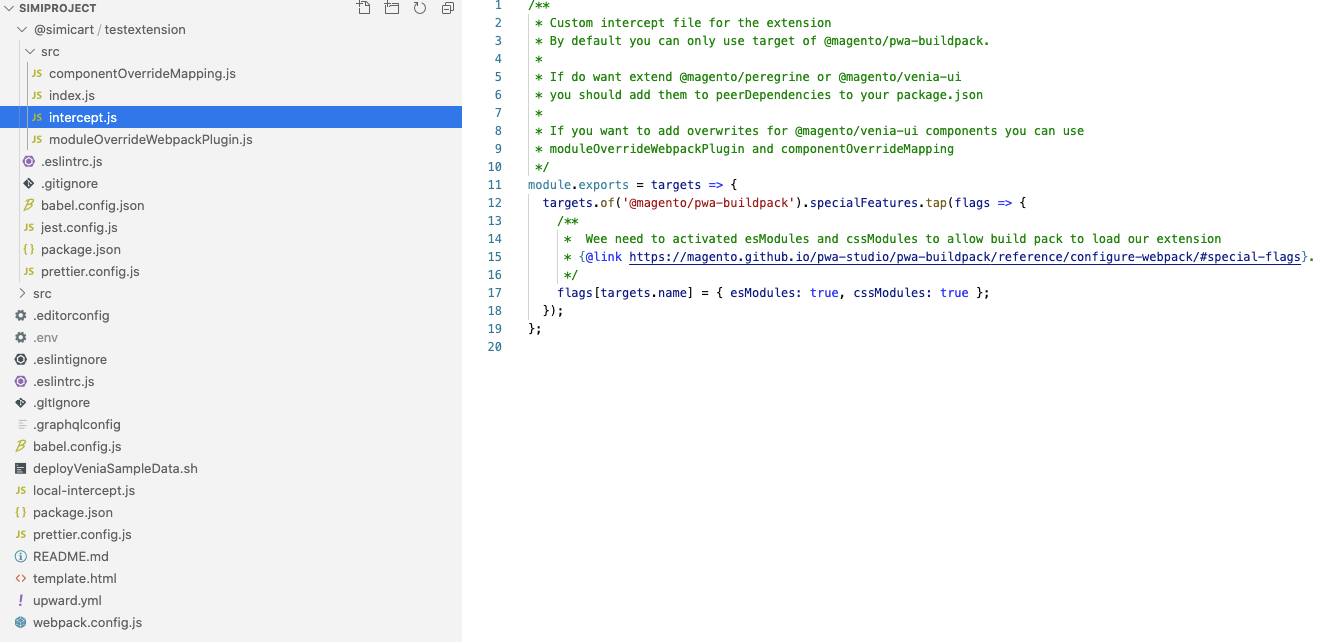
We can now see the intercept.js file has been created, and it already includes overridemapping.
Now let’s try to create a new route in testextension/src/intercept.js
/**
 * Custom intercept file for the extension
 * By default you can only use target of @magento/pwa-buildpack.
 *
 * If do want extend @magento/peregrine or @magento/venia-ui
 * you should add them to peerDependencies to your package.json
 *
 * If you want to add overwrites for @magento/venia-ui components you can use
 * moduleOverrideWebpackPlugin and componentOverrideMapping
 **/
module.exports = targets => {
    targets.of('@magento/pwa-buildpack').specialFeatures.tap(flags => {
        /**
         *  Wee need to activated esModules and cssModules to allow build pack to load our extension
         * {@link https://magento.github.io/pwa-studio/pwa-buildpack/reference/configure-webpack/#special-flags}.
         */
        flags[targets.name] = { esModules: true, cssModules: true };
    });
    targets.of('@magento/venia-ui').routes.tap(
        routesArray => {
            routesArray.push({
                name: 'SimiCart Page',
                pattern: '/simicart',
                path: '@simicart/testextension/src/components/page1'
            });

            return routesArray;
        });
};
Create component for the new route in testextension/src/components/page1/index.js:
import React from 'react';
import {mergeClasses} from '@magento/venia-ui/lib/classify';
import {shape, string} from 'prop-types';

import defaultClasses from './index.css';

const Page1 = props => {
    const classes = mergeClasses(defaultClasses, props.classes);
    return (<div className={classes.root}>SimiCart</div>);
}

Page1.propTypes = {
    classes: shape({root: string})
};
Page1.defaultProps = {};
export default Page1;
Modify package.json to import package:
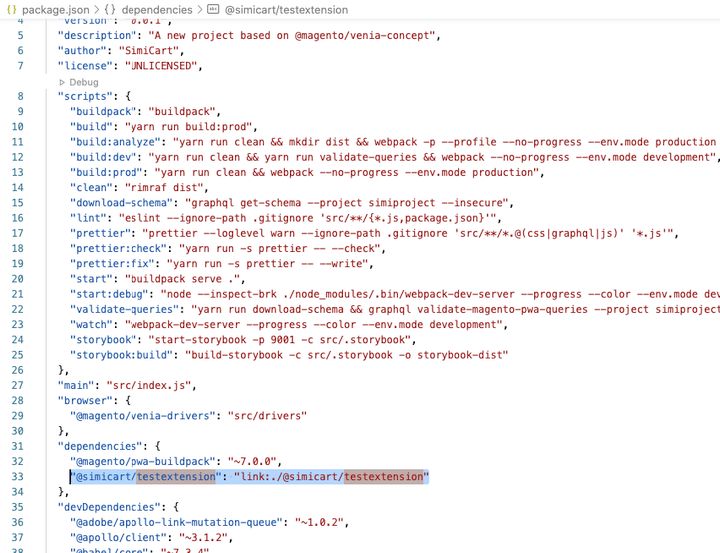
  "dependencies": {
    "@magento/pwa-buildpack": "~7.0.0",
    "@simicart/testextension": "link:./@simicart/testextension"
  },
After which, install and watch to check if the new route is working.
yarn install
yarn watch
3. Overriding components
Following the previous part, this part will be about overriding the existing views of your project.
From the project created in the previous step, we add our override in testextension/src/componentOverrideMapping.js:
/**
 * Mappings for overwrites
 * example: [`@magento/venia-ui/lib/components/Main/main.js`]: './lib/components/Main/main.js'
 */
module.exports = componentOverride = {
    [`@magento/venia-ui/lib/components/Header/header.js`]: '@simicart/testextension/src/override/header.js'
};
Then require this override code into testextension/src/intercept.js:
/**
 * Custom intercept file for the extension
 * By default you can only use target of @magento/pwa-buildpack.
 *
 * If do want extend @magento/peregrine or @magento/venia-ui
 * you should add them to peerDependencies to your package.json
 *
 * If you want to add overwrites for @magento/venia-ui components you can use
 * moduleOverrideWebpackPlugin and componentOverrideMapping
 */
const moduleOverrideWebpackPlugin = require('./moduleOverrideWebpackPlugin');
const componentOverrideMapping = require('./componentOverrideMapping')

module.exports = targets => {
    targets.of('@magento/pwa-buildpack').specialFeatures.tap(flags => {
        /**
         *  Wee need to activated esModules and cssModules to allow build pack to load our extension
         * {@link https://magento.github.io/pwa-studio/pwa-buildpack/reference/configure-webpack/#special-flags}.
         */
        flags[targets.name] = { esModules: true, cssModules: true };
    });

    console.log(targets.of('@magento/pwa-buildpack'));
    targets.of('@magento/venia-ui').routes.tap(
        routesArray => {
            routesArray.push({
                name: 'SimiCartPage',
                pattern: '/simicart',
                path: '@simicart/testextension/src/components/page1'
            });

            return routesArray;
        });
    targets.of('@magento/pwa-buildpack').webpackCompiler.tap(compiler => {
        new moduleOverrideWebpackPlugin(componentOverrideMapping).apply(compiler);
    })
};
Then, from venia-ui folder, copy header component into the new component which we’ll be overriding. Then add one more view into the header we’ve just copied:
import SimiCartIcon from './simicartIcon';
.
.
.
<SimiCartIcon />
Full code in testextension/src/override/header.js:
import React, { Suspense } from 'react';
import { shape, string } from 'prop-types';

import Logo from '@magento/venia-ui/lib/components/Logo';
import resourceUrl from '@magento/peregrine/lib/util/makeUrl';
import { Link, Route } from 'react-router-dom';

import AccountTrigger from '@magento/venia-ui/lib/components/Header/accountTrigger';
import CartTrigger from '@magento/venia-ui/lib/components/Header/cartTrigger';
import NavTrigger from '@magento/venia-ui/lib/components/Header/navTrigger';
import SearchTrigger from '@magento/venia-ui/lib/components/Header/searchTrigger';
import OnlineIndicator from '@magento/venia-ui/lib/components/Header/onlineIndicator';
import { useHeader } from '@magento/peregrine/lib/talons/Header/useHeader';

import { mergeClasses } from '@magento/venia-ui/lib/classify';
import defaultClasses from '@magento/venia-ui/lib/components/Header/header.css';
import PageLoadingIndicator from '@magento/venia-ui/lib/components/PageLoadingIndicator';
import SimiCartIcon from './simicartIcon';

const SearchBar = React.lazy(() => import('@magento/venia-ui/lib/components/SearchBar'));

const Header = props => {
    const {
        handleSearchTriggerClick,
        hasBeenOffline,
        isOnline,
        searchOpen,
        isPageLoading
    } = useHeader();

    const classes = mergeClasses(defaultClasses, props.classes);
    const rootClass = searchOpen ? classes.open : classes.closed;
     const searchBarFallback = (
        <div className={classes.searchFallback}>
            <div className={classes.input}>
                <div className={classes.loader} />
            </div>
        </div>
    );
    const searchBar = searchOpen ? (
        <Suspense fallback={searchBarFallback}>
            <Route>
                <SearchBar isOpen={searchOpen} />
            </Route>
        </Suspense>
    ) : null;
    const pageLoadingIndicator = isPageLoading ? (
        <PageLoadingIndicator />
    ) : null;

    return (
        <header className={rootClass}>
            <div className={classes.toolbar}>
                <div className={classes.primaryActions}>
                    <NavTrigger />
                </div>
                {pageLoadingIndicator}
                <OnlineIndicator
                    hasBeenOffline={hasBeenOffline}
                    isOnline={isOnline}
                />
                <Link to={resourceUrl('/')}>
                    <Logo classes={{ logo: classes.logo }} />
                </Link>
                <div className={classes.secondaryActions}>
                    <SearchTrigger
                        active={searchOpen}
                        onClick={handleSearchTriggerClick}
                    />
                    <AccountTrigger />
                    <SimiCartIcon />
                    <CartTrigger />
                </div>
            </div>
            {searchBar}
        </header>
    );
};

Header.propTypes = {
    classes: shape({
        closed: string,
        logo: string,
        open: string,
        primaryActions: string,
        secondaryActions: string,
        toolbar: string
    })
};

export default Header;
Let’s create this view in testextension/src/override/SimiCartIcon.js:
import React from 'react';
import Icon from '@magento/venia-ui/lib/components/Icon';
import { FastForward } from 'react-feather';
import resourceUrl from '@magento/peregrine/lib/util/makeUrl';
import { useHistory } from 'react-router-dom';
import { shape, string } from 'prop-types';

import defaultClasses from './SimiCartIcon.css';
import { FormattedMessage, useIntl } from 'react-intl';

const SimiCartIcon = props => {
    const classes = defaultClasses;
    const { formatMessage } = useIntl();
    const history = useHistory();

    return (
        <button
            aria-label={formatMessage({
                id: `blog.bloglabel`,
                defaultMessage: 'Blog'
            })}
            className={classes.root}
            onClick={() => history.push(resourceUrl('/simicart'))}
        >
            <Icon src={FastForward} />
            <span className={classes.label}>
                <FormattedMessage id={`Blog`} />
            </span>
        </button>
    );
}

SimiCartIcon.propTypes = {
    classes: shape({ root: string })
};
SimiCartIcon.defaultProps = {};
export default SimiCartIcon;
Then style it:
.root {
    align-items: center;
    cursor: pointer;
    display: inline-flex;
    justify-content: center;
    line-height: 1;
    pointer-events: auto;
    text-align: center;
    white-space: nowrap;
    transition-property: color;
    transition-duration: 224ms;
    transition-timing-function: cubic-bezier(0, 0, 0.2, 1);
    height: 3rem;
    width: 3rem;
}

.label {
    display: none;;
}

@media (min-width: 641px) {
    .root {
        width: auto;
    }
    .label {
        display: initial;
        margin-inline-start: 0.25rem;
    }
}
The result:

And that concludes our tutorial. Feel free to shoot us any question if there’s any confusing part, and if you think this tutorial is helpful, don’t forget to rate it as helpful!
Additionally, if you feel like trying out a Magento PWA Studio extension, we have free and open-source add-on modules which you can install on top of your Magento PWA Studio website.
Read more:


