How to Integrate Geolocation Into Your PWA
Suppose that the user is on a supported browser, you can get your PWA to easily detect the user’s location by using the Geolocation API, or to be more specific, by using the navigator.geolocation object within it.
Here’s how you do it right in your PWA:
Prerequisites
- Solid JavaScript & HTML knowledge.
- A working PWA served over HTTPS (follow our PWA tutorial to create one).
Geolocation in action
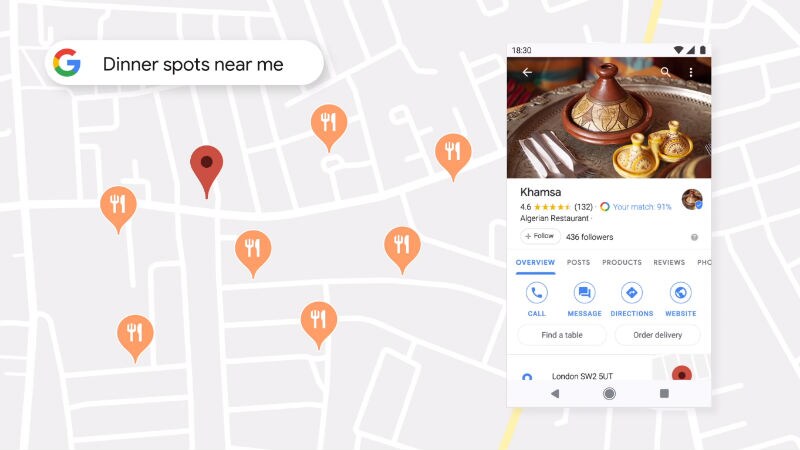
You’re probably no stranger to geolocation by now. With your permission, a website that has geolocation integrated can access your location, using which it can display relevant information in your area, or simply show your location on the map.
How to integrate geolocation into your PWA
The basics
First, we need to understand the underlying mechanism behind the navigator.geolocation object. The navigator object is a container object with which a lot of Web APIs are made available to us. Inside the navigator container is the geolocation object, provided by which are these three methods:
getCurrentPosition()watchPosition()clearWatch()
Using getCurrentPosition() to get the user’s position
The purpose of the first method, getCurrentPosition(), should be self-explanatory to you — it fetches a position of the user’s device.
navigator.geolocation.getCurrentPosition(() => {})The fetched positions are available in coords and timestamp, with coords being a Coordinates object. By default, the Coordinates object is defined by these properties:
accuracythe accuracy of the position in metersaltitudethe altitude of the positionaccuracythe accuracy of the position’s altitude in metersheadingthe direction that the device is heading toward, expressed in degrees. (0 = North, East = 90, South = 180, West = 270)latitudethe latitude of the positionlongitudethe longitude of the positionspeedthe speed at which the device is going, expressed in meters/second
As you might have guessed, devices that lack the proper tracking hardware just won’t receive the full benefits of this API, thus only returning some values and leaving other values null. For example, on a desktop computer, we can only receive the values for longitude, latitude, and accuracy, while the other requested values (heading, speed) come back null.
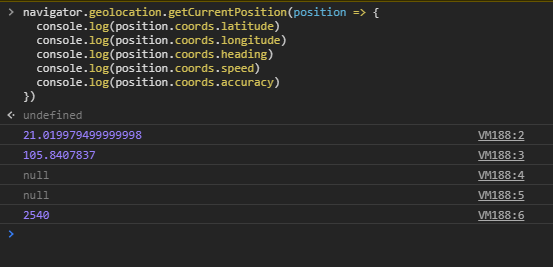
heading and speed both return a null since the browser is run on a desktopwatchPosition() — periodical retrieving of the user’s position
While the aforementioned method is mostly used for retrieving of the user’s position, it isn’t as useful for apps that rely on the precise location of the user, as your users are known to be frequently on the move. This is when we need the watchPosition() method of navigator.geolocation which will register a callback function for periodical updates of the user’s position.
navigator.geolocation.watchPosition(position => {
    console.log(position)
})
The watchPosition method returns a unique transaction id which can be used to stop receiving location updates. Using the unique id and the navigator.geolocation.clearWatch() method, we can stop watching for a position:
const id = navigator.geolocation.watchPosition(position => {
    console.log(position)
})

//stop watching after 10 seconds
setTimeout(() => {
  navigator.geolocation.clearWatch(id)
}, 10 * 1000)
Error handling
It can go haywire pretty soon when you have no proper function set up to handle all the errors. To show errors in a human-readable block, you need to add the following code into whichever is your function for showing location:
function locationError(error) {
    switch(error.code) {
        case error.PERMISSION_DENIED:
            return "User denied the request for geolocation.";
        case error.POSITION_UNAVAILABLE:
            return "Location information is currently unavailable.";
        case error.TIMEOUT:
            return "Request for user location timed out.";
        case error.UNKNOWN_ERROR:
            return "An unknown error occurred.";
    }
}
Additionally, you can test this out in console:
navigator.geolocation.getCurrentPosition(position => {
  console.log(position)
}, error => {
	console.error(error)
})
This will return a code property, with 1 means user permission has been denied, 2 means user position is currently unavailable, and 3 means request was timed out.
Beyond the basics
Understanding the basics is one thing, but you can always strive to be better. Here’s how you can further imrpove your geolocation function.
A timeout when looking up coordinates
In case your users have a sluggish network condition, a timeout can be used to indicate that the operation has expired. To add a timeout, we need to add a third parameter, in which contains the following properties:
timeoutthe number of milliseconds before the operation is expired.maxiumAgethe maximum age of the position cached by the browsers, measured in milliseconds.enableHighAccuracya self-explanatory true/false option which might consume more time and resource in order to fetch more accurate positions.
navigator.geolocation.getCurrentPosition(position => {
  console.log(position)
}, error => {
	console.error(error)
}, {
  timeout: 2000,
  maximumAge: 20000,
  enableHighAccuracy: true
})
Displaying user position on Google Maps
Using Google Maps API, we can display the user’s position on a Google Map.
<script src="//maps.googleapis.com/maps/api/js?v=3.exp&sensor=true"></script>
For a demonstration of the Google Map API on the Web, we recommend this guide from Google: Display User or Device Position on Maps. In the guide, you’ll find a basic HTML with Google Maps API integrated.
Alternatively, use react-geolocated for your React-based PWA
In case you’re not feeling up to it, react-geolocated is also a great way to get geolocation integrated with your React-based app in a quick and effortless way. Simply install the module on top of your existing PWA using:
npm install react-geolocated --save
After which, follow the steps as provided in the official GitHub link and you should have for yourself a functional PWA with built-in geolocation.
>> Recommend reading: 40+ Best PWA Examples (PWA Apps) By Industries in 2025
Conclusion
And that’s it for the geolocation integration process of your PWA. If you find it hard in any part of the tutorial, don’t hesitate to shoot us a question below!