PWA Add to Home Screen: Detailed Guide 2025

PWA Add to Home screen (A2HS for short) is fundamental to the Progressive Web Apps experience as it allows for a full native-app experience, which includes the launching of apps from the user’s home screen.
Recommended reading: PWA vs Native: Which Suits You Better?
Being such a vital feature to your PWA, surely you can’t not have it integrated, which is why today in SimiCart PWA tutorial, we’ll go over the reasons why A2HS is necessary, how it is used and how to make a PWA A2HS-ready, both on mobile and on desktop.
Supporting browsers
A2HS is very close to being a universal feature between browsers. Currently, it is currently supported by Mobile Chrome/Android Webview (from version 31 onwards), Opera for Android (from version 32 onwards) and Firefox for Android (from version 58 onwards). For a more detailed view, check out CanIUse website.
PWA Add to Home screen in action
When coming across a site that’s PWA Add to Home screen enabled (A2HS-Enabled), a banner notifying that the site can be added to your Home screen can be seen at the bottom of the user interface:
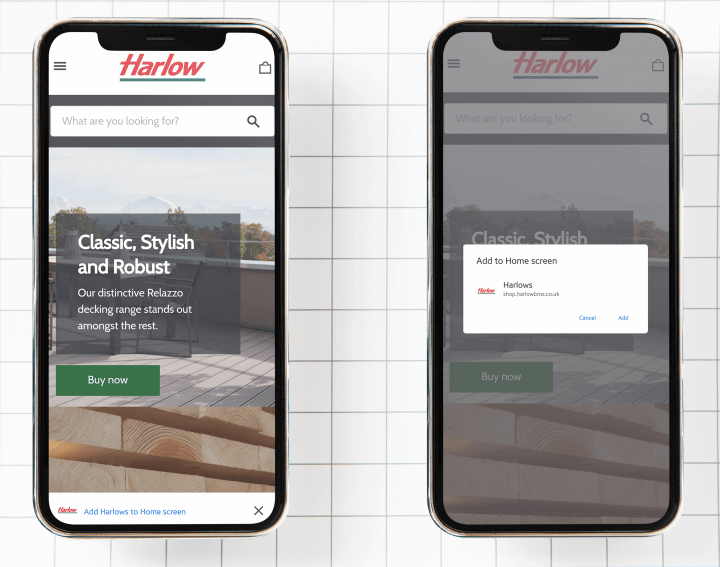
This is the default browser-provided install promotion, which occurs when certain installable criteria are met. The notification itself will be shown the first time a user visits your website and then again after approximately 90 days.
How to make your web app A2HS-enabled on mobile
Installable criteria
For your web app to be installable, it must:
- not already be installed
- meets a user engagement heuristic (the user must interact with the page for at least 30s)
- be served from a secure (HTTPS) connection
- have a service worker registered
- have a properly configured manifest file
- And most importantly, the browser in use must support the
beforeinstallpromptevent. For a full list of browsers that support thebeforeinstallpromptevent, do refer to CanIUse.
Getting started
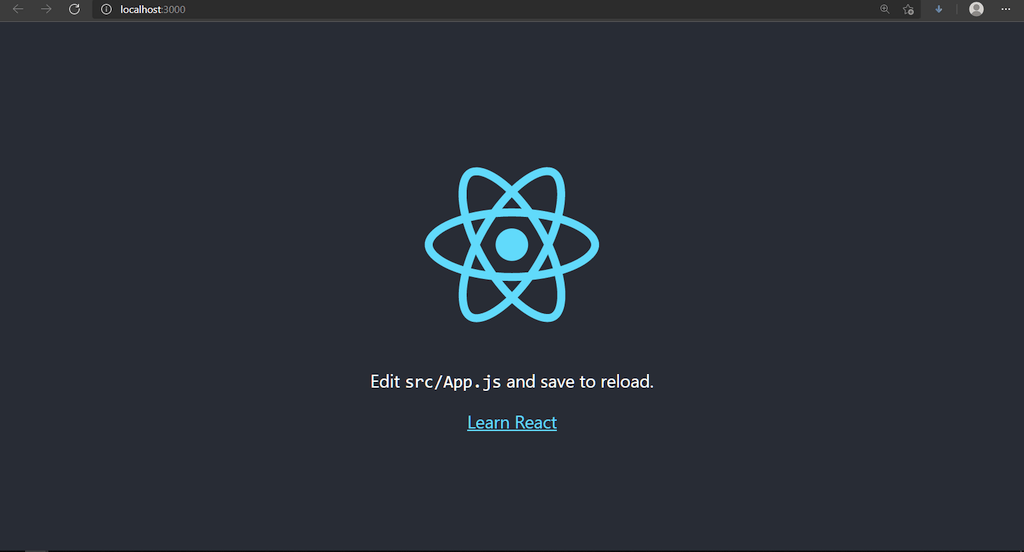
For demonstration purposes, in this article we’ll be using create-react-app project as a base to create an installable PWA. create-react-app is a simple React command to create a single page application.
Note: create-react-app requires at least node >= 10.16 and npm >= 5.6
Open your Node.js Command Prompt run the following commands:
npx create-react-app pwa-a2hs
cd pwa-a2hs
yarn start
Create a manifest file
Usually located deep in the root folder of a web app, your web manifest is a file that contains all of your website’s necessary information—such as your app’s title, paths to different icons, background color, etc—in a JSON format. A web manifest file is crucial to a functional web-app as it allows for proper presentation of your web app at various stages of the user experience.
We recommend using a Manifest Generator to automatically generate the file, along with size-optimized icons for your app.
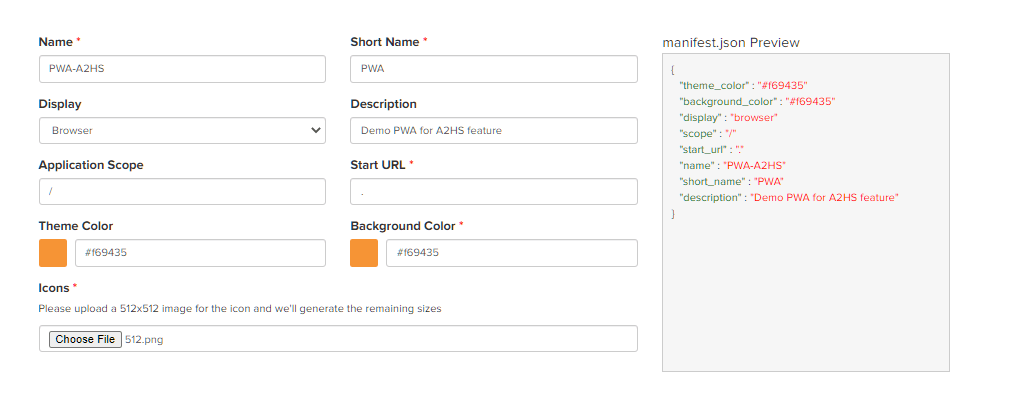
Using the manifest generator, you can have a manifest.zip file with the content like so:
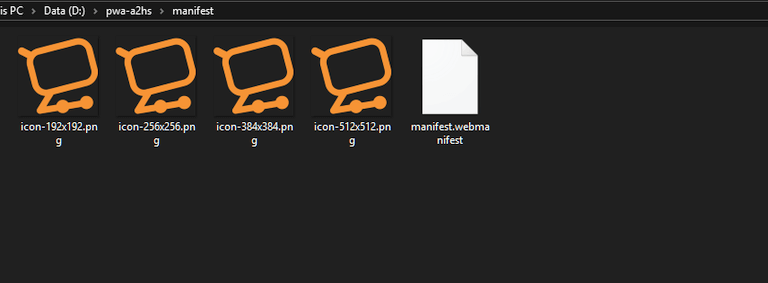
And your manifest.webmanifest should look something like this:
{
    "theme_color": "#f69435",
    "background_color": "#f69435",
    "display": "standalone",
    "scope": "/",
    "start_url": ".",
    "name": "PWA-A2HS",
    "short_name": "PWA",
    "description": "Demo PWA for A2HS feature",
    "icons": [
        {
            "src": "/icon-192x192.png",
            "sizes": "192x192",
            "type": "image/png"
        },
        {
            "src": "/icon-256x256.png",
            "sizes": "256x256",
            "type": "image/png"
        },
        {
            "src": "/icon-384x384.png",
            "sizes": "384x384",
            "type": "image/png"
        },
        {
            "src": "/icon-512x512.png",
            "sizes": "512x512",
            "type": "image/png"
        }
    ]
}
Now copy the content of your generated manifest files to the /public/ folder, delete the default manifest.json file in this folder, and move on to the next step.
Link the HTML to the manifest
When you’re done configuring your manifest file, save it in your website’s root directory so that it can be called later on with a relative path, i.e /manifest.webmanifest.To finish setting up your manifest file, reference it in your HTML header (\pwa-a2hs\public\index.html), like so:
<head>
    <meta charset="utf-8" />
    <link rel="icon" href="%PUBLIC_URL%/favicon.ico" />
    <meta name="viewport" content="width=device-width, initial-scale=1" />
    <meta name="theme-color" content="#000000" />
    <meta
      name="description"
      content="Web site created using create-react-app"
    />
    <link rel="apple-touch-icon" href="%PUBLIC_URL%/logo192.png" />
    <link rel="manifest" href="%PUBLIC_URL%/manifest.webmanifest" />
       <title>PWA A2HS</title>
  </head>
Setup the installation flow
A web app manifest is not all that’s required to make your web app installable. There’s some additional configuration that you’ll have to make in order to make your web app installable and thus, make it one step closer to a PWA.
Create a service worker
The service worker intercepts your network requests and enables various app-like features that PWA is famous for. Create a service-worker.js file in pwa-a2hs\public and fill it with the following content:
self.addEventListener('fetch', function(event) {
  event.respondWith(
      caches.match(event.request).then(function(response) {
          return response || fetch(event.request);
      })
  );
});
Here we’ll need to listen to the fetch event as it is crucial for your add to home screen experience, without it your React app will not be able to meet the installability requirements.
Register your service workers
And in order for our service-worker.js to work, we’ll have to register it by inserting this code at the end of our index.html’s <body>:
//index.html
<script>
    if ('serviceWorker' in navigator) {
      // Register a service worker hosted at the root of the
      // site using the default scope.
      navigator.serviceWorker.register('/service-worker.js').then(function(registration) {
        console.log('Service worker registration succeeded:', registration);
      }, /*catch*/ function(error) {
        console.log('Service worker registration failed:', error);
      });
    } else {
      console.log('Service workers are not supported.');
    }
  </script>
Time to test it!
Your PWA should now be installable. Refresh your frontend and you should see an install button on your taskbar (desktop) or a small notification banner (mobile).
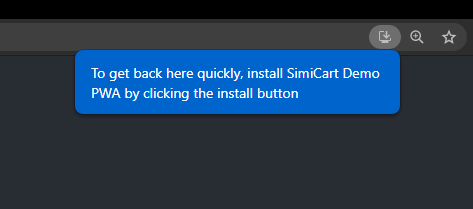
Clicking on Install will result in a PWA shortcut like so on your desktop/homescreen:
There’s more to the A2HS experience
The above is only a basic add to home screen experience using browser-provided install promotion. To take it up a notch, you can also save the beforeinstallprompt event to manually trigger the install flow with various patterns for promoting PWA installation.
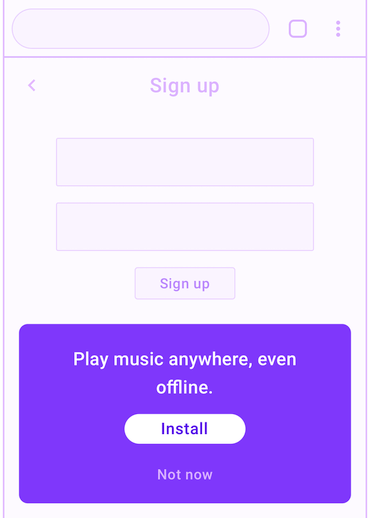
With a custom install button, you can avoid disrupting the user’s journey by targeting the specific users that will benefit from an app installation. And by being thoughtful about where and where to place the promotion UI, your PWA add to home screen is likely to do better than your competitors and will gain much better app conversion rates as a result.