
Table of contents
Magento Devbox is a new development environment option that is built on Docker.
It is delivered to you, all packaged with everything you would need, within seconds. That includes Magento, Redis, Varnish, the web server, database… and anything that might be necessary for a project. The good thing is that even though Devbox is primarily intended for developers, you don’t need to be one to be able to use it. All you have to do is freely choose the mix of settings you like and you’ll receive a zipped file all pre-configured ready to use in Magento environment.
Inheriting from Docker – a lightweight alternative, Devbox’s strongest cart is the containerization which simplifies the installation of different services. Therefore, you can now run multiple isolated development environments installed with all kind of versions of services while consuming fewer of host machine’s resources. In fact, thanks to Docker’s containers, now you can reduce the memory consumption by just starting or stopping the environment for the project you’re working on.
Another big win for developer teams working on Magento is that Devbox is a consistent and easily replicated development environment. All members can quickly switch between projects with the same set of tools or share the project with each other. Thusly, you will have exactly the same development environment as your co-worker without “it’s not working on my desktop” things!
The selling point of Magento Devbox is that a brand new installation only takes about 15 minutes to get done. So let’s get Devbox to work!
Step 1: Set up Docker
– Install Docker
Source: docs.docker.com
– Set up Docker file sharing
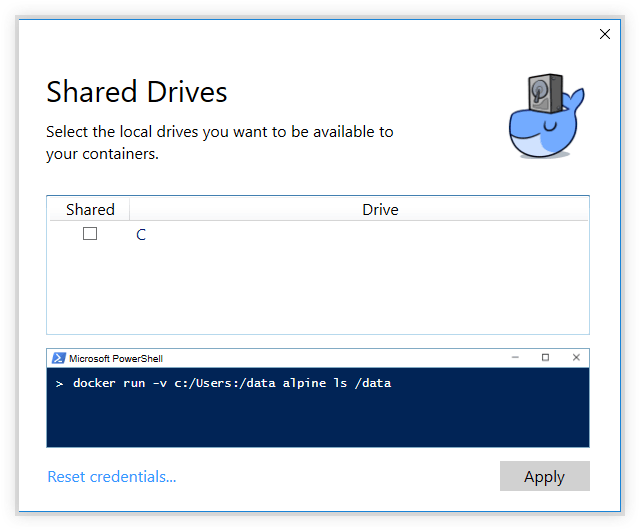
For Windows
Source: docs.docker.com
- Right-click the Docker icon in the system tray.
- From the pop-up menu, click Settings.
- Click the Shared Drives tab.This tab page displays all drives that Docker currently knows about. Make sure you install Magento in a drive listed on this tab page.
- Select the checkbox next to the drive in which to install Magento.
- Click Apply.
For Mac OS
- Right-click the Docker logo.
- From the pop-up menu, click Preferences.
- In the Preferences dialog box, click the File Sharing tab.This tab page displays all shared directories that Docker currently knows about. Make sure you install Magento in a folder listed on this tab page.
- To add additional directories, follow the prompts on your screen or consult Docker documentation.
Step 2: Download Magento Devbox
Step 3:Install and configure Magento Devbox
After downloading a Zip file, extract it.
Then to run the scripts, you should open a DOS command prompt (Windows) or Terminal (Mac) window and change to the DevBox root folder.
The following DevBox scripts and configuration files are located in the root folder:
m2devbox-init.[bat|sh]which starts the DevBox installation.m2devbox-reset.[bat|sh]which restarts the DevBox installation.You can run this script, for example, after you stop and start your computer or Docker. DevBox assigns new ports to services.docker-compose.ymlDevBox configuration file. Set static listen ports* so you don’t have to reconfigure PhpStorm every time you start DevBox.- Windows only:
m2devbox-unison-sync.batwhich runs Unison file synchronization. You should not run this script by itself; one of the other scripts starts it automatically. - Mac OS only:
m2devbox-debug.shwhich opens an SSH tunnel to the Docker container so PhpStorm can connect to it.
*Set static listen ports
By default, every time you start a Docker container, all listen ports are reassigned randomly. To cause DevBox to use the same listen ports every time you restart, you must modify docker-compose.yml before you initialize DevBox for the first time.
To set static listen ports:
- Open
docker-compose.ymlin a text editor.It’s located in the root directory to which you downloaded DevBox. - Locate the
ports:section. - Precede the default listen port with a free port number followed by
:An example:ports: - "12345:80" - "54321:22"The preceding example causes the web container to listen on port 12345 and SSH to listen on port 54321.


