
Table of contents
Building a Magento site requires coding, everyone knows it. We have written dozens of articles telling how important it is to have a reliable expert develop your Magento website. While it remains true, it may not be that difficult anymore. The latest version of Magento Open Source 2.4.3 comes with an intuitive drag-and-drop page builder, and maybe you can build one on your own.
Let us not wait longer. We will take you to some simple steps to get a Magento website.
7 steps to easily build a Magento website
1. Choose a hosting plan & domain name
Unlike SaaS platforms like Shopify or BigCommerce, open-source platforms like Magento need a server to host websites. Thus, before getting down to the actual building process, we need to shop for an appropriate hosting plan for Magento first.
Hosting requirements for Magento 2.4.3
Magento has its specific system requirements to ensure installation success as well as the best environment to maintain a stable and highly-performing site. It’s important not to ignore these requirements.
You can check a more detailed list of Magento 2.4.x system requirements here.
Notably, for Magento 2.4 onward, it is a must to have a search engine called Elasticsearch and a minimum memory of 2GB RAM.
Good hosting options for Magento 2.4.3
The best hosting choices for Magento 2.4.3 must first meet all of the requirements above. Plus, to easily build a Magento website, it’s highly recommended that one-click installation is available.
As Elasticsearch does not work in a shared hosting environment, hosting for Magento 2.4 requires more advanced plans (e.g VPS hosting or dedicated hosting). Thus, you may need to pay more to host a Magento 2.4 website than a 2.3 website.
It’s not easy to find a good hosting solution with so many requirements. Don’t worry, we have done our research, and here are the perfect options for you:
- Cloudways
- Hostinger (Cloud Hosting only)
- Fast Comet
- Digital Ocean
- Krystals
- Inmotion Hosting
Get a domain name

A domain name is a unique link address for your website, which customers will use to reach your online store. Whereas some hosting providers include a free domain name in their package, some (e.g Cloudways, DigitalOCean) do not.
You can get yourself a domain name from a domain registrar. Here are our favorite ones:
2. Install Magento 2.4.3 on your server
After you have signed up for a hosting account, it’s time to build your Magento website.
Traditionally, we would need certain software pre-installed such as Composer, and lots of coding skills to do this.
However, for this easy installation guide, we are gonna use the auto-installation feature provided by one of the hosting companies above – Cloudways.
By using this method, you don’t need any IT knowledge or to install any special software. Everything can be done intuitively on your web browser.
Notes before installing
As we are using Cloudways for this guide, it’s worth noting that this is a cloud hosting service.
If you have experienced buying hosting before, you may have noticed that cloud hosting is a bit different from traditional hosting (web-based hosting).
Don’t worry, it’s a good difference. In a nutshell, cloud hosting will work in a pay-as-you-go model and offer better flexibility in bandwidth usage. The drawback is that cloud hosting relies on internet connectivity, which may lead to unwanted downtime.
For a more detailed comparison between web and cloud hosting, please check our dedicated article about eCommerce hosting.
As for pricing, Cloudways requires at least 4GB RAM to install Magento 2.4.3 with Elasticsearch. Thus, it costs from $42/month to build the latest versions of Magento 2 with Cloudways.
If the hosting pricing is not reasonable for your business, it’s better to install Magento 2.3 instead.
>> See more: Best hosting providers for Magento 2
If you are OK with this hosting option, let’s get started.
Build a Magento website in a few clicks.
STEP 1: Create a Cloudways account from its specific page for Magento
STEP 2: Verify your account
STEP 3: Complete some setting options as follows
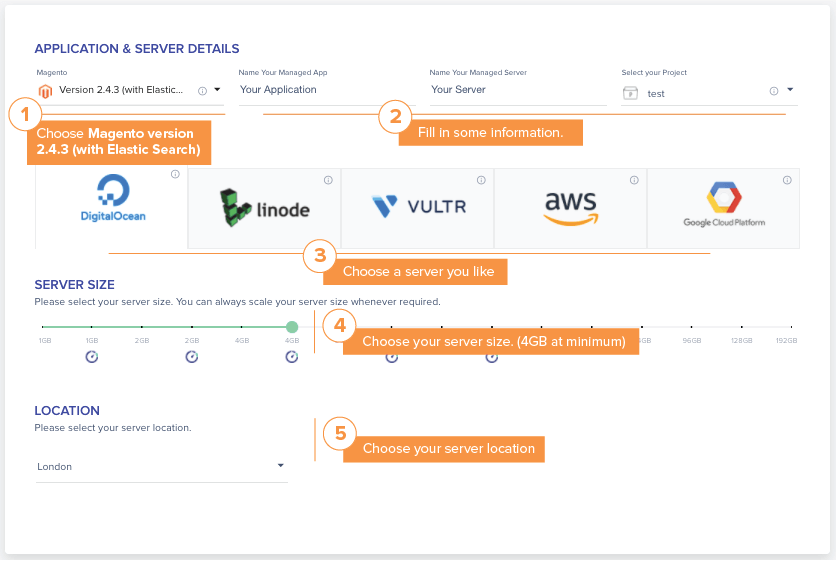
STEP 4: Click Launch & wait
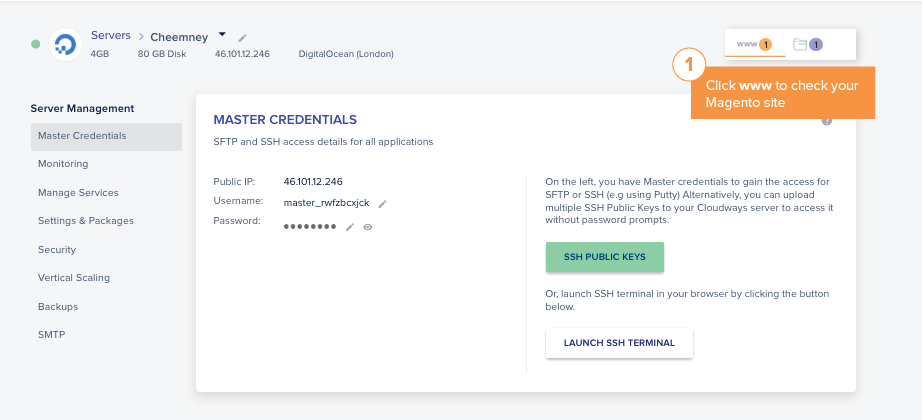
STEP 5: Check your server details
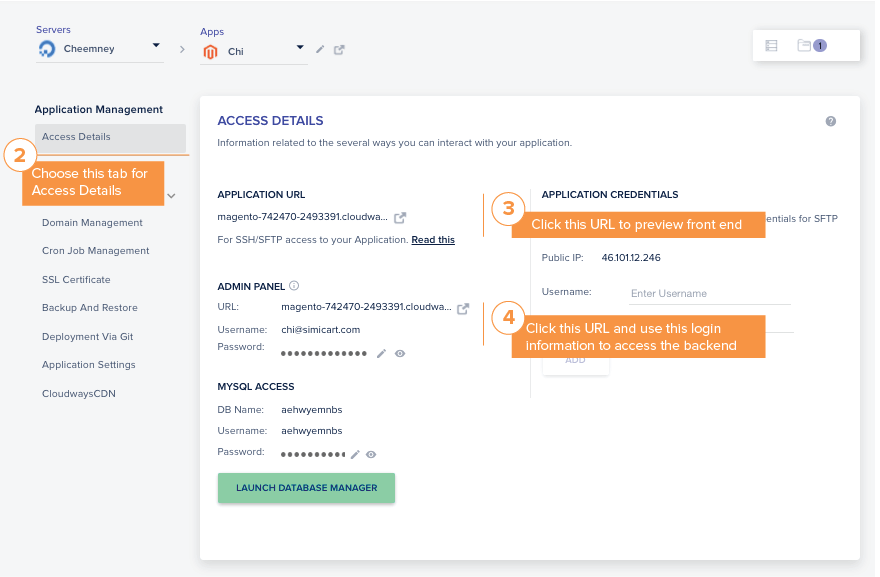
STEP 6: Check your application (i.e your Magento website)’s details following these instructions:
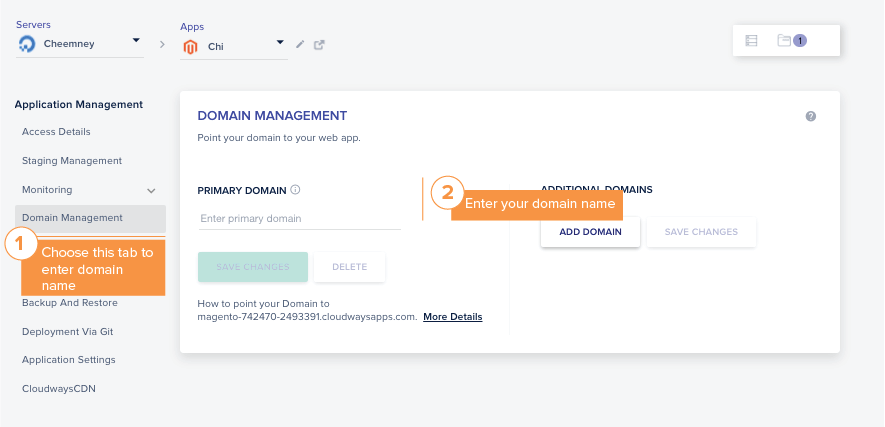
STEP 7: Enter your domain name
And voila, it’s done.
3. Configure your store’s basic settings
Magento offers more than 100 features for you to sell online on its platform, and it’s good to spend some time exploring them to enrich your store’s functionality.
For now, we will guide you through the best features that every store owner should not miss.
Let’s start with the most basic – your store’s general information. First, navigate to Store > Configuration.
There are lots of settings to be made, here are some most important ones:
- Country, location, timezone, store information. Navigate to the General tab under the General dropdown
- Currency options. Navigate to General > Currency Setup
- Store email address used when sending order information. Navigate to General > Store Email Address
- Contact. Navigate to General > Contact
4. Set up catalog categories
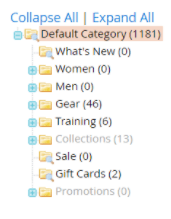
Categories in Magento are organized like a tree with roots and many expanding branches.
- Root: If you have a website with multiple stores, a root represents each store. The set of categories right below the root will be shown in the top menu navigation. You can choose different sets of root categories for each website to offer different top navigation menus accordingly.
- Subcategories: subcategories can be added from the root, which lets you organize your store products conveniently. You can add as many subcategories as you like.
Before you start
When customizing options for catalogs & products, you may come across these terms in brackets like this a lot (store view/store/global):
It is about Magento’s content hierarchy.
As Magento enables multiple websites in one domain & multiple store views in one website, the bracketed content indicates where the input information will be applied: in all websites (global) or stores only.
If you are creating a complicated store with multiple store views & websites, please learn about Magento’s content hierarchy first.
How to set up category catalogs
To create a catalog category for Magento, please follow these steps:
STEP 1: Navigate to Catalog > Categories
STEP 2: Decide where the categories will be shown by choosing an option in the Scope field.
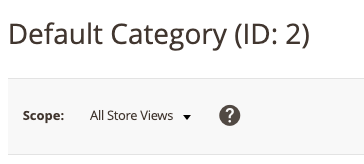
STEP 3: Choose a parent category for the category you are creating in the category tree.
For a brand new site, if you are creating categories for your eCommerce site’s menu navigation, the parent category is the root (i.e Default Category).
STEP 4: Click Add Subcategory
STEP 5: Complete some basic information then click SAVE
- If you want the category to be available right away, set Yes to Enable Category
- If you want the category to be featured in the top navigation, set Yes to Include In Menu
STEP 6: Open the Content dropdown, add images and descriptions to the category
- Reduce your images’ sizes so they won’t cause your site to load slowly. You may want to do it right at first so you won’t waste more time fixing this later.
- You can use the default page builder to edit your category content if you opt for it instead of other third-party options to create your category.
STEP 7: Open the Display Setting dropdown, and configure display options.
In this section, you can choose whether to include filtering & sorting features for your category pages.
STEP 8: Configure SEO settings
SEO is short for Search Engine Optimization, which is a practice to get your website to rank in a high position in result pages of search engines like Google. It is an amazing source of organic traffic and customers.
We will get deeper into SEO in the later section of this article. For now, it’s important to fill in the meta title & the meta description fields for the category pages, so you don’t have to do it later after having created dozens of categories.
- Title: (30 – 60 characters) a short description of your category page, which should include the keyword your customers would type in search engines when looking for products of this category.
- Meta description: (135-160 characters) explain more about the category, how it is better than other competitors, your offer (e.g. free ship, return within 7 days, etc).
Don’t want to write a bunch of meta-title and meta-descriptions? How about trying some SEO extensions.
5. Add products
Magento is a powerful platform for product merchandising as it offers a great many built-in features to create a highly-converting product page.
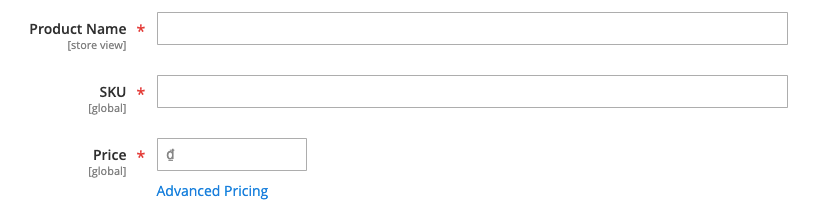
When you open the Magento backend’s product configuration page, you may find some new terms that may be hard to get at first. Once you’ve grasped the ideas, building product pages will be easy as pie.
Now, first, please navigate to Catalog > Product and let us walk you through the most important things to notice:
Product type
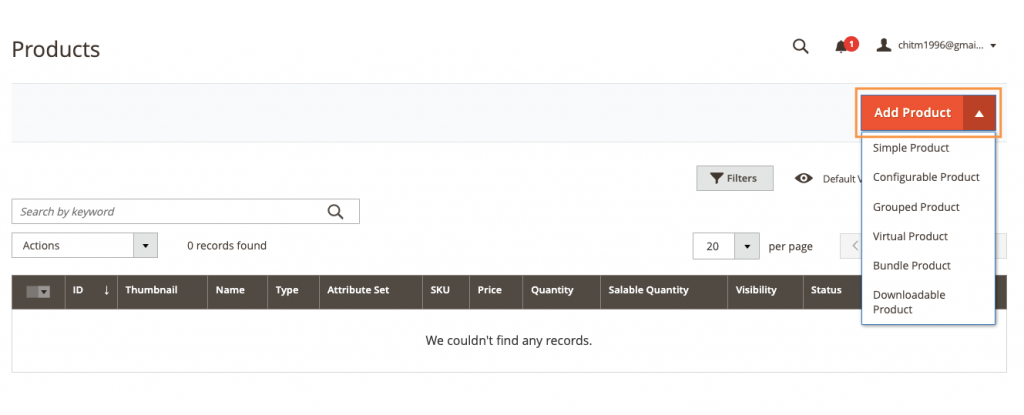
Simply click the little triangle in the Add Product button, you will find 6 options for the product type. It’s important to choose a product type before importing a new product because you won’t be able to change it later.
- Simple product: An individual item with an SKU. You can apply multiple prices and input fields to sell different variations of the product. Simple products can be used with configurable products, grouped, and bundle products.
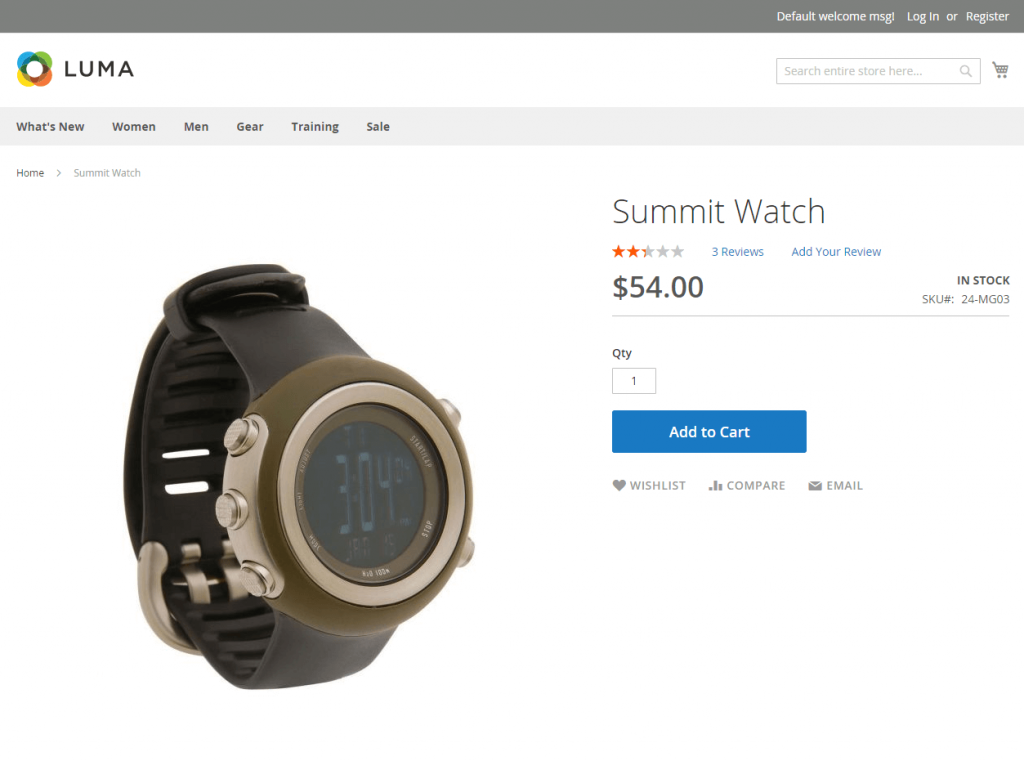
A simple product is great for items that do not have any variations.
- Configurable products: An individual product with variations available and your customers can choose options for each variation. Each option is a simple product with its own SKU, which makes it easier to track inventory for these product variations.
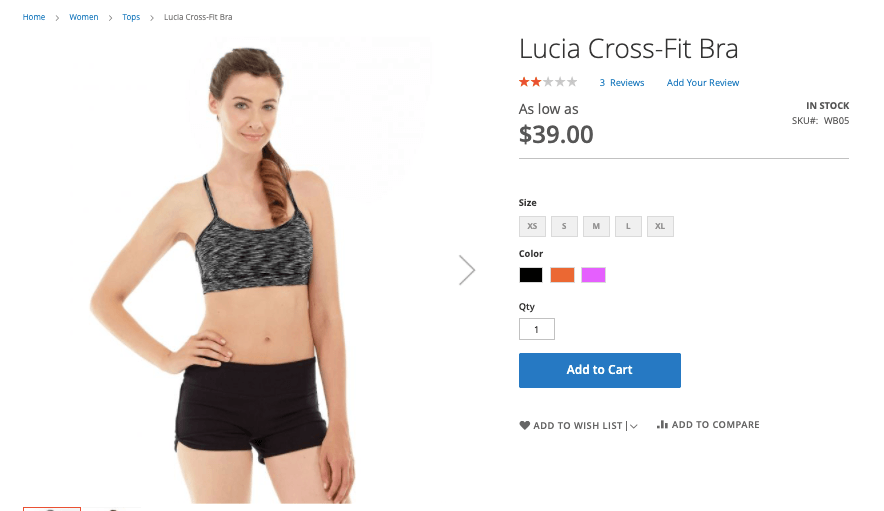
Configurable product is ideal for items with complicated variations. For example, a shirt with various options for colors & sizes.
- Grouped products: A group of simple products. You can sell each product separately or promote your customers to buy a bunch with special discounts & offers.
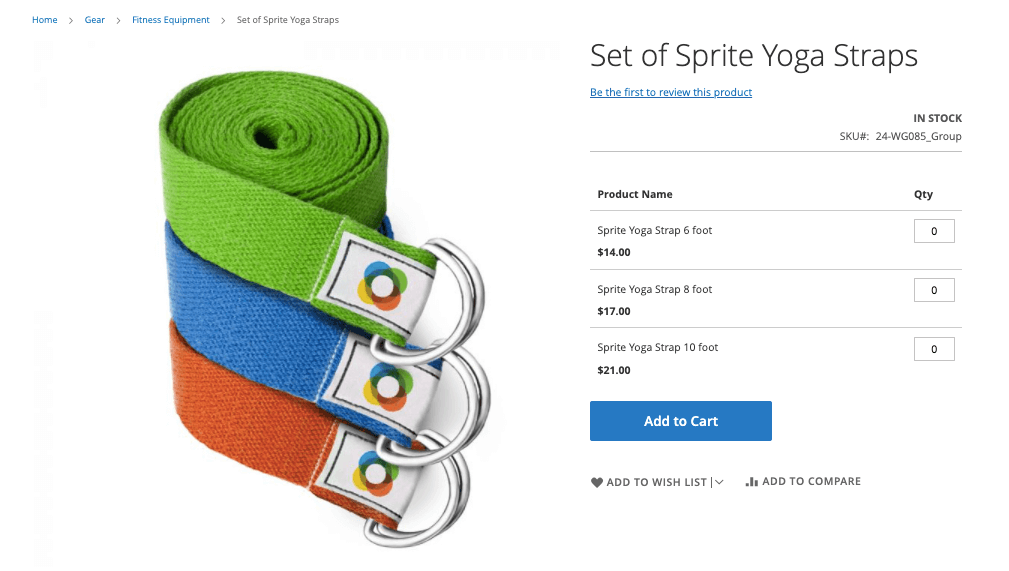
Example: A set of yoga straps of different lengths, a complete 7-book collection of Harry Potter
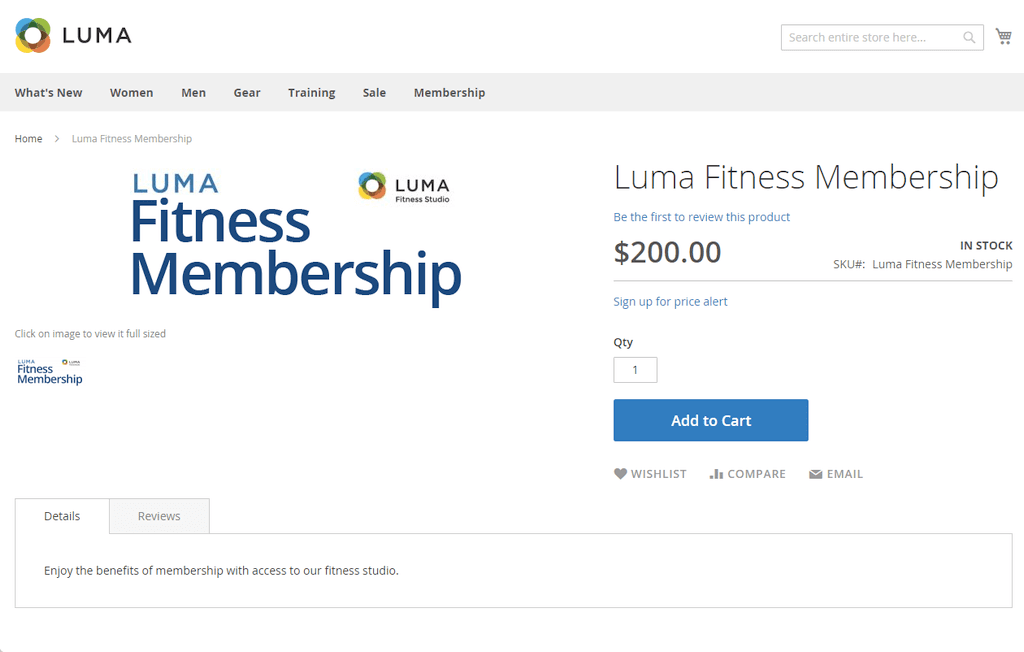
- Virtual product: intangible products such as memberships, subscriptions, services, warranties. You can include virtual products in your grouped or bundle products.
- Bundle product: A group of simple products just like grouped products. However, for a bundle product, your customers can choose to customize each simple product of the bundle from an options list.
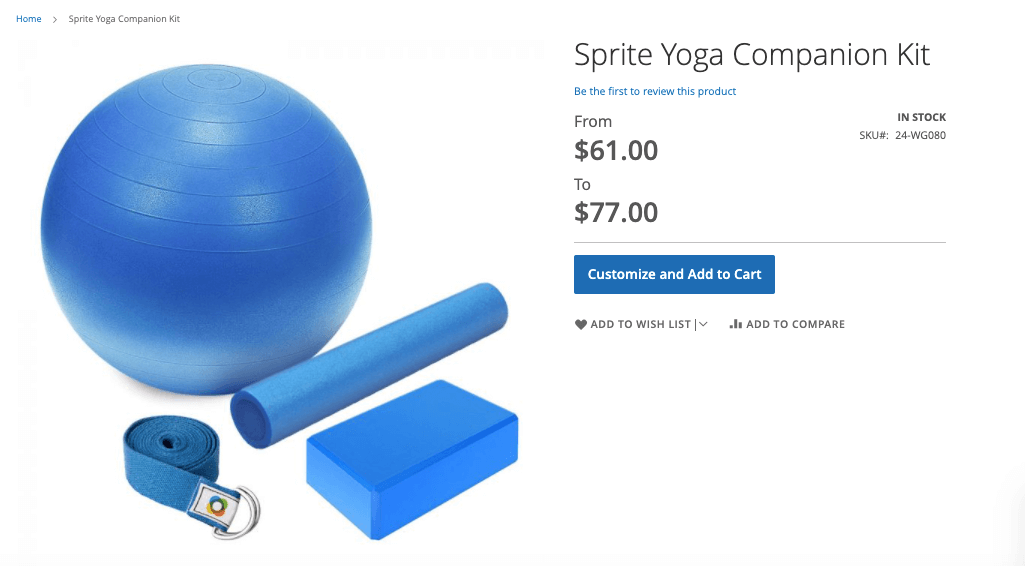
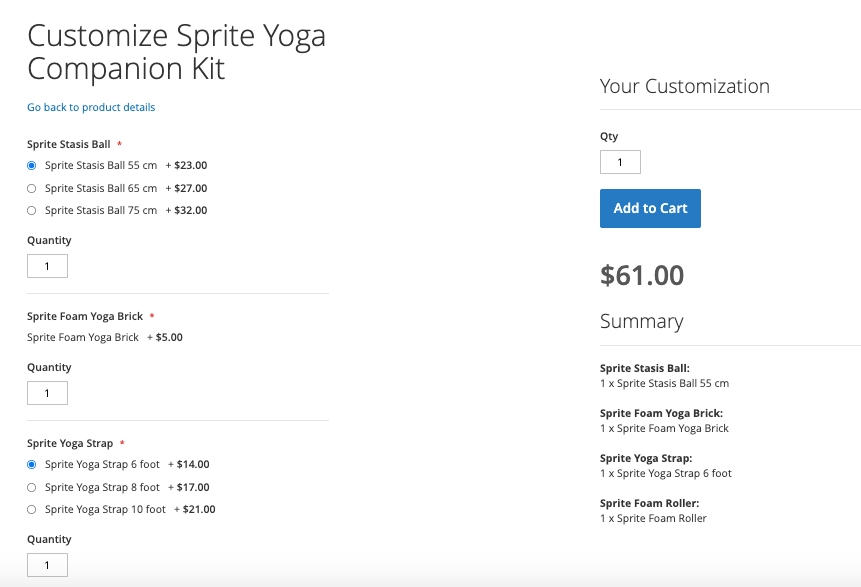
For example: a gift basket of protein bars, noodles, and nutrition powder & buyers can choose the flavor or size of each item.
- Downloadable product: Products that your customers can download from your server, or your provided URLs.

Examples: video, ebook, gift cards.
Attribute
After choosing a product type, a product configuration popup will appear & you can opt for an attribute set.
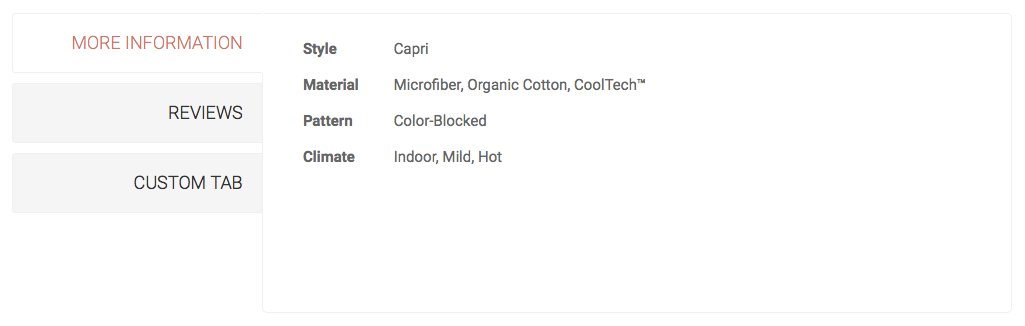
The attribute provides additional information for your products, enabling product filtering, sorting & comparison. Magento has some built-in attributes like price, SKU, name, etc. These are system attributes that can not be changed or deleted.
Different types of items require a different set of attributes. For instance, attributes for cameras may be related to their brand, whether a lens is included, their status (brand new, second hand), etc. On the other hand, attributes for shoes will be something like sizes, colors, materials, etc.
Magento allows you to create many sets of attributes for your various types of products.
You can easily create a new one by clicking the Add Attribute button. Moreover, you can also decide how to use the attributes: whether to use it in layered navigation, for product searches & product comparisons or not.
Product content & SEO options
Just like editing the catalogs, you can use the page builder to create content for your product pages, upload photos, edit product descriptions and fill in meta titles & meta descriptions for SEO.
Please remember to reduce image sizes before uploading for a faster website. Also, you should refer to our on-page SEO practices in the later section to write product descriptions that attract more customers to your website.
Product recommendations
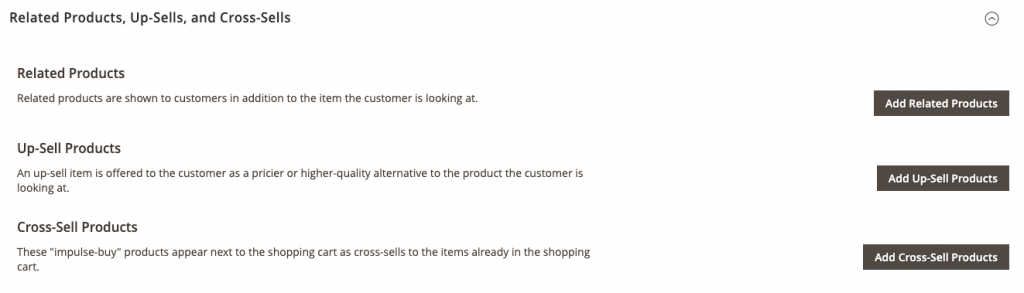
Magento lets you add relevant products to upsell & cross-sell. Don’t skip this section that can increase the engagement rate & order values for your stores.
6. Set up tax, payment & delivery
Tax, payment & shipment are crucial for your customers to complete a transaction on your Magento website. Let’s configure options for these to create a smooth checkout experience.
Tax options
With Magento, you can control tax applied for specific customers segments, product types & delivery methods. For example, tax may not be applied for your wholesaler’s group but is applied for your retailer’s group.
Similarly, tax rates for various product types may differ.
Here are some tax-related settings you should make
- Set up tax rates & zones
As different geographical zones may apply different tax rates (e.g. a state does not tax medicine), this tool allows you to conveniently set up taxes for various locations.
Find Store > Tax > Tax Zones and Rates to start editing.
You can add, edit, or delete any tax rates. To define a tax rate, you can enter the tax percentage, tax identifier, and the country, its zip code & state it is applied.
For step-by-step instruction, please refer to Magento’s official tax guide
- Create tax rules & tax classes
Tax rules let you apply a specific tax rate to a combination of a customer tax class and a product tax class. For example, setting a tax rate for VIP customers who purchase taxable goods.
You can do it by navigating to Store > Tax > Tax rules. To add tax class, click Add New Tax Rule & click to show more settings.

- Manage the overall tax setting in Store > Configurations > Sales > Tax
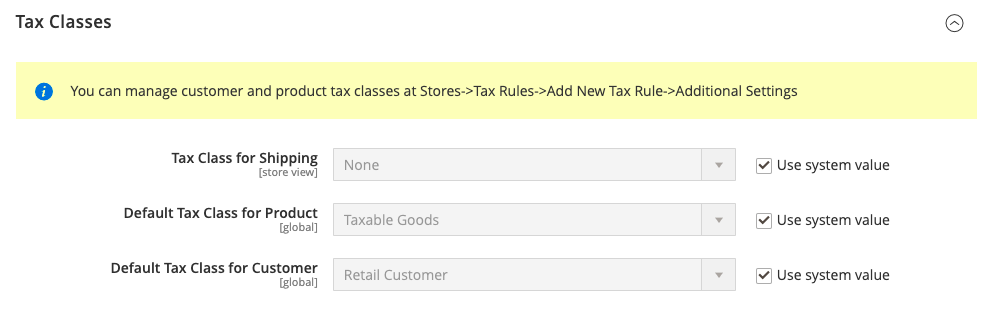
The configuration options let you set default tax classes for shipping, product & customer. Moreover, you can also choose how tax calculation is made, and whether to include or exclude taxes on multiple pricing displays.
Payment options
Magento lets you select your desired payment gateways at Store > Configurations > Sales > Payment Methods.
Originally, there are options to use PayPal, Braintree, Klarna, and Amazon Pay. However, you can always choose another payment method for your business by integrating payment extensions.
Furthermore, you can configure options for other payment methods such as Cash On Delivery, Purchase Order, Bank Transfer. For example, Magento lets you control the geographical location these payment methods are applied to or whether they are enabled on the website.
Shipping options
Simply navigate to Store > Configurations > Sales, choose Shipping Settings > Multiple Shipping Settings > Delivery Methods to customize their further options.
- Shipping settings: Choose the origin from where your shipment will take place. You can also show a custom shipment policy on your checkout page. A shipping origin can be selected for each website of your backend.
- Multiple Shipping Settings: enable the delivery to many addresses and the minimum order quantity to offer this delivery solution.
- Delivery methods: for this section, you can configure settings for different delivery methods, from flat-rate, table rate to free shipping & in-store delivery. It lets you decide which countries a delivery method is applied to, how to calculate handling fees, and more. Furthermore, settings for some major shipment carriers like FedEx, DHL, or UPS are also available.
>> Check this Magento’s official document for more detailed instructions.
7. Drag-and-drop your storefronts
Now let’s get to the most exciting part of building a website: creating stunning storefronts.
There are two ways you can do this without coding.
Option 1: Use Magento’s default page builder
One of the most significant updates in Magento Open Source 2.4.3 is its built-in page builder tool. With this tool, you do not have to ask for technical help every time you want to make changes to your storefront.
You can build your storefront on your own from the beginning. Let us show you how:
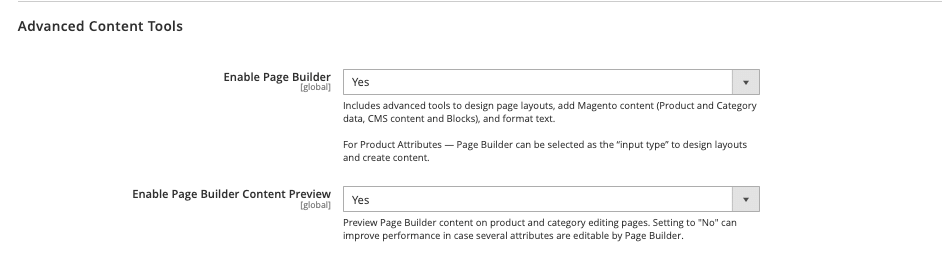
STEP 1: Navigate to Store > Configuration > General > Content Management
STEP 2: Set Enable Page Builder & Enable Page Builder Content Preview to Yes.
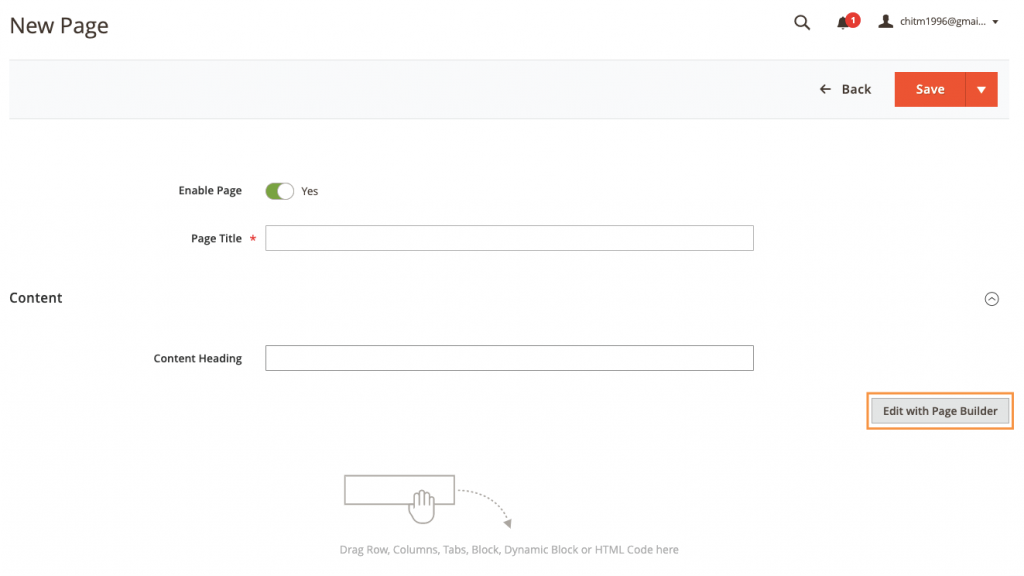
STEP 3: Navigate to Content > Pages
STEP 4: Click Add New page or choose to edit any page in the default options list.
STEP 5: Click Edit with Page Builder
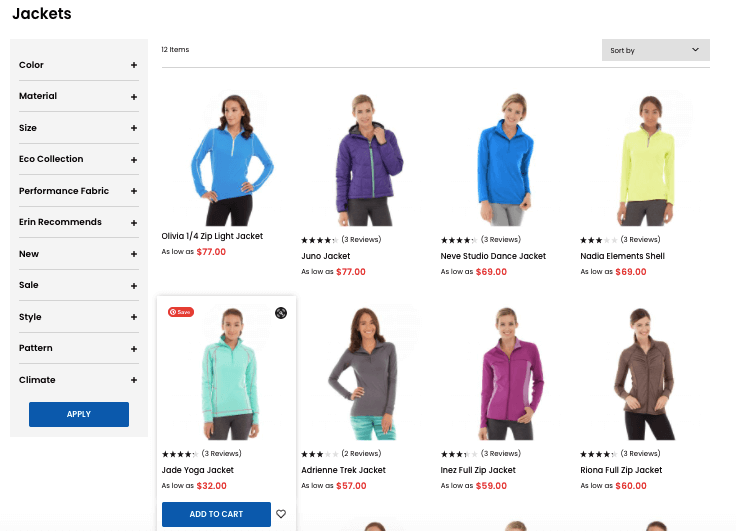
Instead of building from scratch, you can shorten the process by installing Magento’s default theme – Luma – and modifying the theme.
If you are curious, here’s how the theme look like: DEMO
Unfortunately, the only way to use this theme is to upload Magento Open Source 2.4.3’s sample data before or after installing the application, which requires some technical knowledge.
Check the official documentation by Adobe (Magento) to learn further about how to install the sample data.
Option 2: Use a third-party page builder
If you are wondering if there are any options to build a Magento website on your own without wasting so much time, yes, there is.
There are several page builders available for Magento with ready-made templates. You can just easily adjust these templates to match your store’s look and feel, then publish the pages.
We have created another article for the best page builders for Magento 2 if you are feeling like having a round of e-shopping now.
For this guide, we will instruct you to use Tapita – our dedicated page builder to build a Magento website effortlessly.
Note: if you decide to try a third-party page builder, please refer to our instructions to create a staging website for Magento before getting started.
It’s important to take this step to avoid any risks of system errors when you modify Magento’s backend with a third-party app.
STEP 1: Follow Tapita’s instructions to create an account & set up integration
STEP 2: Navigate to the page-builder dashboard, choose the tab Regular Pages under the Pages dropdown.
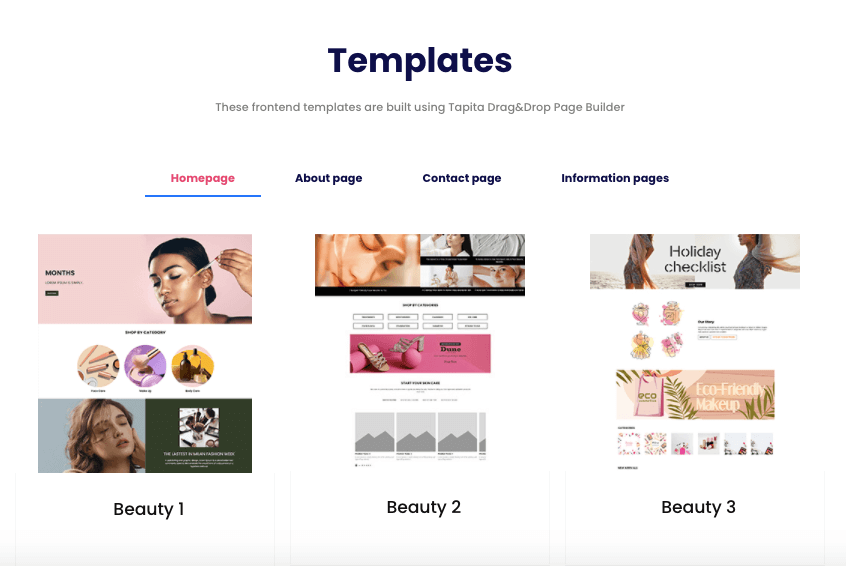
STEP 3: Select Add New, choose a template and start editing
Tapita features 50+ templates crafted for different eCommerce industries from fashion, beauty to electronics, bikes, etc.
Further steps to take
Now your Magento store is ready to rock, but it does not mean that everything is done. In fact, it’s time to test its sales performances & find ways to improve it gradually.
Here are what you should consider to sell online with Magento successfully.
Leverage SEO
SEO is short for Search Engine Optimization, which helps your website to be found in search engines’ search results. Think of the websites in Google’s first result pages, those websites can attract a huge number of visitors every day without running a single ad campaign.
You may want to implement SEO practices for your website. Not only does it bring new visitors, it especially brings visitors who want to buy. That’s why they search for it in the first place. SEO is an effective sales channel for eCommerce besides email marketing and paid ads.
On-page SEO for product pages
On-page SEO means creating SEO-friendly content for your website, which is a top practice for an eCommerce website to rank well on search engines.
You should consider writing an SEO-friendly product description from the first time you import your product. Otherwise, you will waste time writing descriptions only to edit them again.
A good product description for SEO must include keywords related to your products, have a clear paragraph structure while not being too short.
Make sure to understand essential eCommerce SEO practices before starting some creative copywriting.
To learn more about how to do SEO the right way, check our guide:
>> Actionable SEO guide for Magento
>> The SEO checklist for Magento
Get some Magento extensions
There are over 3,000 extensions for Magento, and some of them can help improve your store significantly.
What Magento extensions you need depend on your business and your marketing strategy, and it’s good to explore BSS Commerce Magento 2 extension category for more inspiration.
You can also check our article for eCommerce website requirements, where we list the most important factors to sell online. From here, you can find some ideas to search for plugins.
Here are some things to consider:
- Integrate your Magento store with Google Analytics for free to see how your store performs in terms of SEO.
- Get a loyalty reward program for Magento to attract frequent customers.
- Connect with a Magento POS system for omnichannel sales
- Connect your store with Facebook Pixel to run highly-converting ads on Facebook.
- Enhance customer experience with Magento 2 One Step Checkout.
- Optimize SEO performance with Magento 2 SEO Extension.
It’s highly recommended to create a cloned website of your Magento site to test the extension before using it for your authentic site to minimize unwanted errors.
Optimize speed & mobile experiences
You have made serious efforts to build a stunning Magento website, and you have also invested in some good plugins.
However, everything will be worthless if your site is so slow that your customers can’t enjoy anything. Similarly, if the experience on your desktop site is top-notch, but your mobile site is nowhere near, you may lose lots of mobile shoppers.
Therefore, every Magento merchant must optimize their site’s speed & improve the user experience on mobile.
We have told you to use lightweight images to increase speed in the previous sections. You can also make further speed optimization for your Magento store.
Moreover, you might consider Progressive Web App to speed up your site. (If you don’t know about PWA, it’s time to). Progressive Web App technology can improve your site performance significantly while providing the engaging experience of a native app on phone browsers.
>> See more:
- How PWA can help your Magento business
- Get a shopping app to improve the mobile experience
- PWA vs native app
Create a staging Magento website
A staging website is a clone of your original site. It has its own database, web server, and other services.
Why do you need a staging website?
Whenever you make a technical interference in your Magento’s backend, for example, integrating a new extension, system errors may occur.
You probably do not want this to happen. It may take forever to fix, not to mention that it may affect your product collections and many other settings.
A staging website lets you test any modifications & see if there are any system risks before actually making changes to your original site.
As we will instruct you to integrate with a third-party plugin in the following step, it’s crucial to create a staging environment now. After finishing every setup, if the extension works fine in your clone website, you can do the same integration with your genuine one.
If you’re not gonna use any extension to build your Magento website, then it’s not necessary to create a staging environment right now. However, please remember to make one if you upgrade your platform, add new plugins, or make any further coding modifications.
How to create a staging environment for Magento 2
The processes vary depending on the hosting service you opt for. Since we use Cloudways for this guide, we will continue to explain the how-to for this hosting provider.
STEP 1: Navigating to the Staging Management tab in the Application Management dashboard.
STEP 2: Click Create Staging
STEP 3: Choose a server for the staging website. Any option will do.
STEP 4: Wait for site deployment
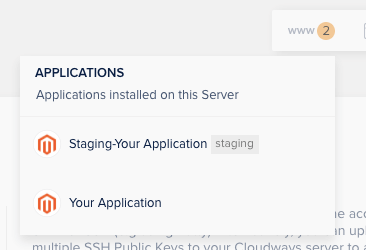
STEP 5: In the dropdown options for applications, choose Staging Your Application
STEP 6: As another application management dashboard shows up, navigate to Access Details & open the Application URL
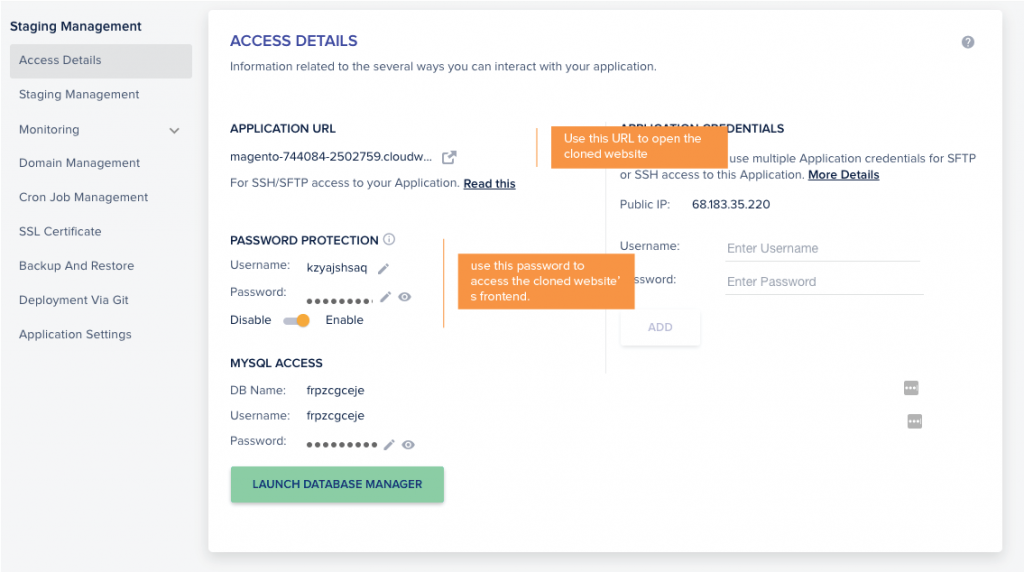
STEP 7: The new frontend will require a password, enter the username & password found in the below section of Access Details.
STEP 8: As you enter the cloned frontend, in the domain address, enter /admin after the main domain.

STEP 9: A backend’s login page will show up, enter the username & password of your original website.
STEP 10: Now you’ve accessed your cloned website successfully & can freely make any vital changes.
STEP 11: After finishing all of your adjustments it’s time to launch this staging website. In the Application Management Dashboard for the staging application, choose Staging Management.
STEP 12: In the section for Copy Data From Staging To Live, click Push

STEP 13: You will be asked to fill in some options. Please take this step carefully.
- Choose Web Application Files > Overwrite if you want to overwrite all web application files of the staging website onto your current original website.
- Choose Web Application Files > Incremental if you want to only apply new changes in the web application files of the staging website onto your current original website.
- Choose Database > Overwrite if you want to overwrite all databases of the staging website onto your current original website.
- Choose Database > Selected Timetable if you want to only use selected database files of the staging website, and apply them onto your current original website.
For this guide only, we will choose Web Application Files > Overwrite & Database > Overwrite
STEP 14: [Important] Choose Yes, please take backup & click Proceed. Now all changes in your staging website are applied to your original website.
Restore backups
If you encounter some problems with your new updated site, or just simply want to go back to its previous version, you can restore it anytime.
STEP 1: In the Application Management Dashboard of your official application, navigate to the Restore & Setup tab.
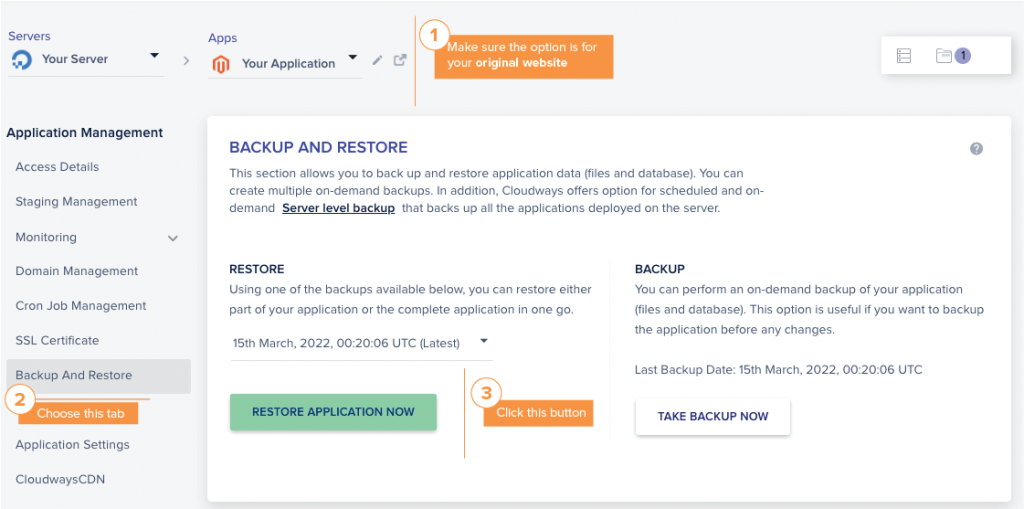
STEP 2: Find the backup file you create in step 14 by choosing the right time, then click Restore Application Now.
Tell us if you’ve made it!
Tell us if you have finished everything and created your own Magento website.
While you don’t need any coding experience to follow this guide, maintaining a Magento website will do. From adding a new plugin, customizing functionalities, to optimizing speed, IT work is needed to keep a healthy & efficient Magento store.
That being said, there’re lots of things to do, building a Magento website is only the first step.
We hope we have made the first step easy for you.”As the saying goes “Well begun is half done”, let it be a good start for plenty of eCommerce success ahead.


